Cherry Pie Bars have a special place in my heart, and I’m so excited to share this recipe with you. I remember my mom making these whenever we had a family gathering, and the sweet, tart cherry aroma filling the kitchen always meant good times were ahead. These bars have that perfect balance of a buttery shortbread crust, a vibrant cherry filling, and a delightful crumble topping that just melts in your mouth. They truly are some of the most easy cherry pie bars you can whip up for any occasion, making them a go-to for busy bakers like me. Let’s get baking!
Why You’ll Love This Cherry Pie Bar Recipe
These bars are a game-changer for any dessert lover! Here’s why you’ll want to make them again and again:
- Incredible Flavor: The perfect blend of sweet and tart cherries with a buttery, crumbly crust is simply irresistible.
- Effortless to Make: Even if you’re new to baking, these bars are incredibly forgiving and straightforward.
- Versatile Treat: They’re perfect for picnics, potlucks, holidays, or just a simple afternoon pick-me-up.
- Homemade Goodness: Experience the joy of truly homemade cherry pie bars that taste so much better than store-bought.
- Crowd-Pleaser: Everyone adores these fruity delights, making them a guaranteed hit at any gathering.
- Deliciously Simple: As some of the most easy cherry pie bars, they deliver maximum flavor with minimal fuss.
- Perfectly Portable: These bars are easy to slice and transport, making them ideal for on-the-go enjoyment.
- Truly Homemade Cherry Pie Bars: You’ll feel proud serving these from scratch.
Cherry Pie Bar Ingredients
Gathering the right cherry pie bar ingredients is the first step to baking these delicious treats. You’ll need a few simple items for both the crust and the filling. The key to a tender crust is using cold butter, cut into cubes – this creates those lovely flaky layers. For the filling, pitted cherries, whether fresh or frozen, are essential for that classic sweet and tart flavor. The cornstarch acts as our thickener, ensuring a perfectly gooey filling that doesn’t run everywhere. Let’s get these ready!
- 225 g all-purpose flour – forms the base of our shortbread crust
- 75 g granulated sugar – for a touch of sweetness in the crust
- 150 g cold unsalted butter, cut into cubes – essential for a tender, flaky crust
- 1/4 tsp salt – enhances all the flavors
- 400 g pitted fresh or frozen cherries – the star of our sweet and tart filling
- 100 g granulated sugar – balances the tartness of the cherries
- 2 tbsp cornstarch – to thicken the cherry filling
- 1 tbsp fresh lemon juice – brightens the cherry flavor
- 1/2 tsp vanilla extract – adds a warm, comforting note
How to Make Cherry Pie Bars
Follow these cherry pie bar instructions to create a truly delightful dessert.
- Step 1: Preheat your oven to 175°C (350°F). Line a 20 cm square baking pan with parchment paper, leaving some overhang to help lift the bars out later.
- Step 2: In a large bowl, whisk together the 225 g all-purpose flour, 75 g granulated sugar, and 1/4 tsp salt. Add the 150 g cold unsalted butter, cut into cubes. Use a pastry blender or your fingertips to cut the butter into the dry ingredients until the mixture resembles coarse crumbs.
- Step 3: Take about one-third of this crumb mixture and set it aside for the topping. Press the remaining crumb mixture evenly into the bottom of your prepared baking pan. I like to use the bottom of a glass to get a nice, even layer.
- Step 4: Place the pan with the crust into the freezer for about 15 minutes to firm up while you prepare the filling. This helps prevent a soggy bottom.
- Step 5: In a medium saucepan, combine the 400 g pitted fresh or frozen cherries, 100 g granulated sugar, and 2 tbsp cornstarch. Cook over medium heat, stirring frequently. You’ll notice the fruit releasing its juices and the mixture starting to bubble and thicken, which usually takes about 5-7 minutes. The aroma is amazing!
- Step 6: Remove the cherry filling from the heat. Stir in the 1 tbsp fresh lemon juice and 1/2 tsp vanilla extract. The lemon juice really brightens up the cherry flavor. Let this delicious filling cool slightly.
- Step 7: Spoon the slightly cooled cherry filling evenly over the chilled crust in the pan. Make sure to spread it all the way to the edges.
- Step 8: Sprinkle the reserved crumb mixture generously over the cherry layer. Gently press the crumbs down so they adhere to the filling.
- Step 9: Bake for 30-35 minutes, or until the topping is golden brown and you see the cherry filling bubbling around the edges. This is how you know your homemade cherry pie bars are ready.
- Step 10: Let the bars cool completely in the pan on a wire rack before lifting them out and cutting them into squares. Patience here is key for clean cuts! This is a crucial part of how to make cherry pie bars that look as good as they taste.

Pro Tips for the Best Cherry Pie Bars
I’ve learned a few tricks over the years to make sure these bars turn out perfectly every time. Following these tips will elevate your cherry pie bar experience!
- Always use cold butter for the crust; it makes the shortbread wonderfully tender and flaky.
- Don’t overmix the crust ingredients – just combine them until they form coarse crumbs.
- Ensure your cherry filling is slightly cooled before spreading it onto the crust to prevent it from melting the base.
- Let the bars cool completely before cutting. This is crucial for clean slices and prevents a messy presentation.
What’s the secret to perfect cherry pie bars?
The secret to truly perfect sweet cherry pie bars lies in the crust’s texture and the filling’s balance. Using cold butter and not overworking the dough creates a tender, crumbly base, while a touch of lemon juice in the filling cuts through the sweetness, making the cherry flavor pop. For more baking tips, check out these general baking tips.
Can I make cherry pie bars ahead of time?
Yes, you absolutely can! You can prepare the crust and crumble topping a day in advance and store them separately in the refrigerator. The filling can also be made ahead and chilled. Assemble and bake just before you plan to serve for the freshest taste.
How do I avoid common mistakes with cherry pie bars?
A common pitfall is a soggy bottom crust. To avoid this, make sure to press the crust firmly into the pan and chill it for at least 15 minutes before adding the filling and baking. Another tip is to ensure your cherry filling is thickened properly; if it’s too runny, the bars might be difficult to cut. Understanding how to properly thicken fruit fillings can be helpful, and resources on fruit preparation can offer guidance.
Best Ways to Serve Cherry Pie Bars
These bars are so versatile; they make a fantastic cherry pie bar dessert for almost any occasion. For a classic treat, I love serving them slightly warm with a scoop of vanilla bean ice cream. The contrast of the warm, fruity bar and the cold, creamy ice cream is pure magic! You could also dust them with a little powdered sugar for an elegant touch, perfect for a tea party or a special brunch. They’re also delightful served alongside a dollop of fresh whipped cream or a drizzle of sweetened condensed milk for an extra layer of deliciousness. Learn more about different serving suggestions for desserts.
Cherry Pie Bar Variations
I love how adaptable these cherry pie bars are! If you’re looking for different ways to enjoy this classic dessert, you’ve come to the right place. These cherry pie bar variations offer something for everyone.
- Gluten-Free Cherry Pie Bars: Simply swap out the all-purpose flour for a good quality gluten-free baking blend. You might need to add a touch more liquid to the crust mixture, but the results are wonderfully chewy and delicious.
- Vegan Cherry Pie Bars: For a plant-based version, use vegan butter sticks in place of the butter for the crust and topping. Ensure your sugar is vegan-friendly, and you’ll have a fantastic dairy-free treat.
- No-Bake Cherry Pie Bars: While baking gives them that perfect crisp topping, you can create a no-bake version by using crushed graham crackers or digestive biscuits mixed with melted butter for the crust. Chill until firm, then top with a no-cook cherry filling (perhaps a cherry pie filling from a can, thickened slightly if needed).
- Flavor Twists: Don’t be afraid to experiment! Adding a pinch of almond extract or a teaspoon of cinnamon to the cherry filling can offer a delightful new dimension. You can also mix in a handful of fresh blueberries or raspberries with the cherries for a mixed-berry crumble bar.

Storage and Reheating Cherry Pie Bars
Once your delicious cherry pie bars have cooled completely, it’s time to think about storing them. Proper storage helps maintain their wonderful texture, whether you plan to enjoy them over the next few days or much later. You can keep these lovely fruit crumble bars in an airtight container at room temperature for up to 3 days. If you want them to last longer, pop them into the refrigerator, where they’ll stay fresh for up to a week. For even longer storage, these bars freeze beautifully! For tips on freezing and storing baked goods, consult resources on food preservation.
To freeze, I like to cut the bars and place them between layers of parchment paper in a freezer-safe container or bag. They can stay frozen for up to 3 months. When you’re ready to enjoy them again, you can thaw them overnight in the refrigerator. If you prefer them warm, you can gently reheat them in a low oven (around 150°C or 300°F) for about 5-10 minutes until warmed through. This reheating method really brings back that fresh-baked flavor!
Print
Easy Cherry Pie Bars: Best Homemade Recipe
- Total Time: 55 minutes
- Yield: 16 bars 1x
- Diet: Vegetarian
Description
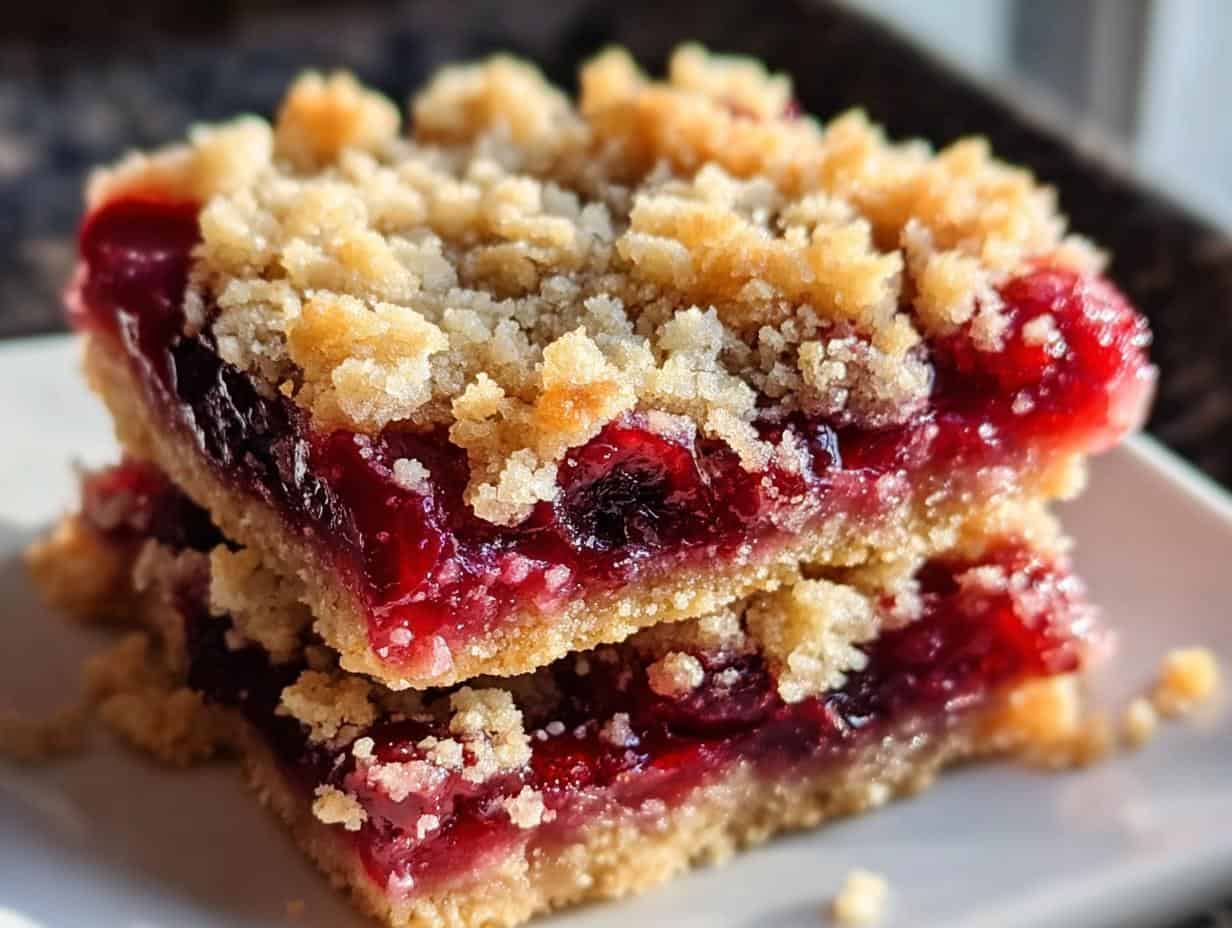
These cherry pie bars offer a buttery shortbread crust, a sweet and tart cherry filling, and a crumbly streusel topping, creating a delicious handheld dessert perfect for any occasion.
Ingredients
- 225 g all-purpose flour
- 75 g granulated sugar
- 150 g cold unsalted butter, cut into cubes
- 1/4 tsp salt
- 400 g pitted fresh or frozen cherries
- 100 g granulated sugar
- 2 tbsp cornstarch
- 1 tbsp fresh lemon juice
- 1/2 tsp vanilla extract
Instructions
- Combine flour, sugar, and salt in a large bowl. Cut in cold butter using a pastry cutter or fork until the mixture resembles coarse crumbs.
- Reserve about one-third of the crumb mixture for the topping. Press the remaining mixture evenly into the bottom of a parchment-lined 20 cm square baking pan. Chill for 15 minutes.
- In a medium saucepan over medium heat, combine cherries, sugar, and cornstarch. Stir regularly until the fruit releases its juices and the mixture thickens, about 5-7 minutes.
- Remove from heat and stir in lemon juice and vanilla extract. Let the cherry filling cool slightly.
- Preheat your oven to 175°C (350°F).
- Spoon the cooled cherry filling evenly over the chilled crust.
- Sprinkle the reserved crumb mixture generously over the cherry layer, pressing lightly.
- Bake for 30-35 minutes, or until the topping is golden and the filling is bubbling at the edges.
- Let the cherry pie bars cool completely in the pan on a wire rack before lifting out and cutting into 16 squares.
Notes
- Using frozen cherries is convenient; thaw and drain excess liquid before cooking.
- For extra flavor, add a pinch of almond extract to the cherry filling.
- Store bars in an airtight container at room temperature for up to 3 days or refrigerate for up to a week.
- Freeze individual bars between parchment paper sheets for longer storage.
- Prep Time: 20 minutes
- Cook Time: 35 minutes
- Category: Dessert
- Method: Baking
- Cuisine: American
Nutrition
- Serving Size: 1 bar
- Calories: Approximately 250 kcal
- Sugar: Approximately 20 g
- Sodium: Approximately 50 mg
- Fat: Approximately 15 g
- Saturated Fat: Approximately 9 g
- Unsaturated Fat: Approximately 6 g
- Trans Fat: 0 g
- Carbohydrates: Approximately 30 g
- Fiber: Approximately 2 g
- Protein: Approximately 3 g
- Cholesterol: Approximately 35 mg
Keywords: Cherry Pie Bars, cherry pie bar recipe, easy cherry pie bars, homemade cherry pie bars, best cherry pie bars, quick cherry pie bars, cherry pie bar dessert, cherry pie bar instructions, what are cherry pie bars, how to make cherry pie bars, cherry pie bars with crumble topping, gluten-free cherry pie bars, vegan cherry pie bars, cherry pie bars for baking, cherry pie bar variations, cherry pie bar ingredients, delicious cherry pie bars, sweet cherry pie bars, fruity pie bars, fruit crumble bars